How I Built a {Codestore} Themed Custom Keyboard
Nov 11, 2023
What is the most important tool of every software developer? It's not the IDE, it's not the programming language, it's not the libraries and frameworks. It's the keyboard! Although this blog is mainly software related, I want to write about a hardware topic in this article: custom mechanical keyboards.
A few months ago, I watched a video of a guy who got a mechanical keyboard and assembled it by his own. As someone who loves to work on his own computer and who is always looking for possibilities to dive into new technical topics, I was instantly hooked. A few weeks and dozens of videos later, I was trapped inside the enormous rabbit hole of custom mechanical keyboards. There are so many aspects of a keyboard you can customize. Not only the aesthetics. It's also about the look, feel and sound of the keyboard. You can customize every aspect from the materials of the case, the haptic of the mechanical switches, the material and size of the keycaps and of course the overall appearance.
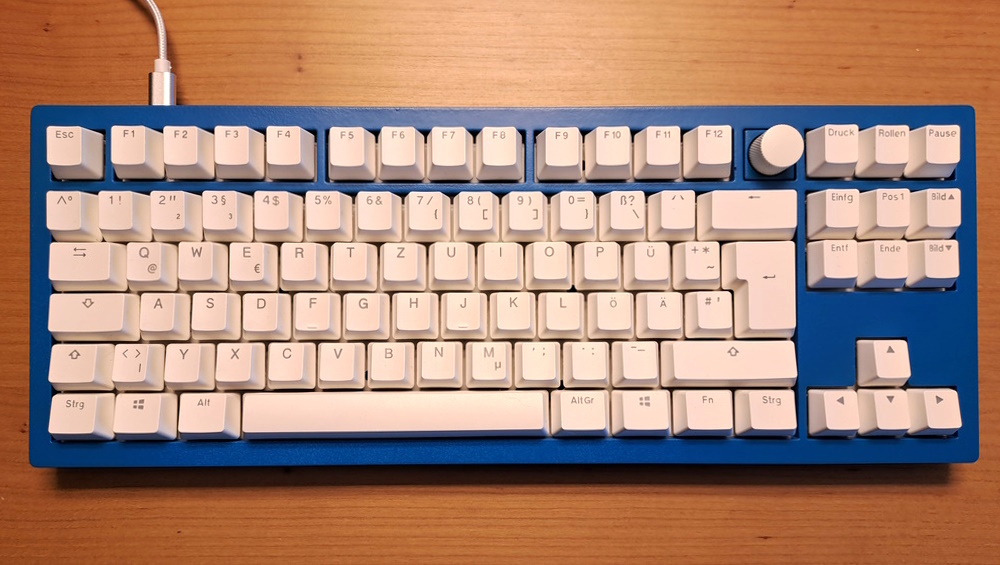
The more I read about that topic, the more I couldn't wait to get my own hands dirty and to build my own mechanical keyboard. Of course, I wanted to create something unique that wouldn't exist again like this. So I decided to create a {CodeStore} themed keyboard having a blue case and white keycaps. Additionally, I wanted it to be as quiet as possible, because I planned to use it at the office and mechanical keyboards are known to be quite noisy.
The Keyboard: Keychron V3
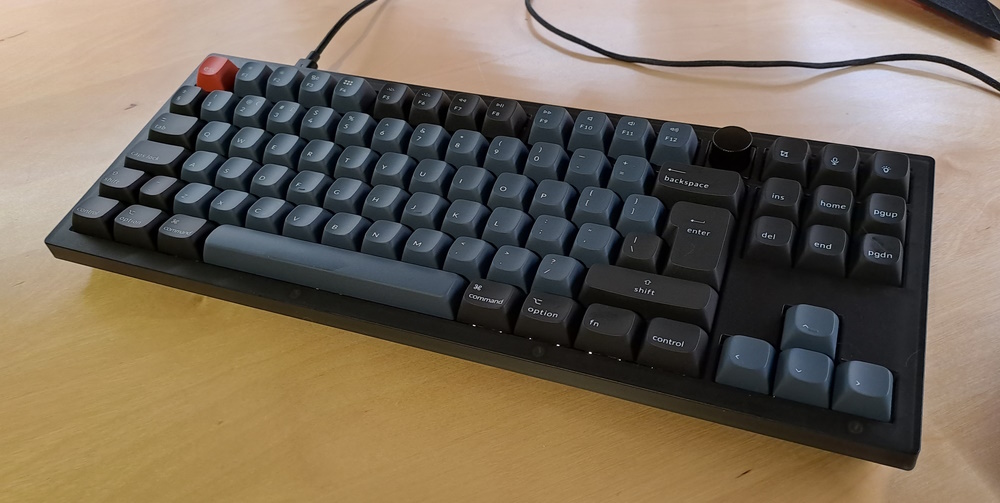
The base for my custom keyboard is a Keychron V3. It provides full customization at a reasonable price. Additionally, it contains a silicone inlay which reduces the sound when typing. I got the UK layout because the German layout was unfortunately not available. But that didn't matter because I was going to replace them anyway.
If you plan to buy a mechanical keyboard for customization, one of the most important things to be aware of is that the keyboard should be "hot-swappable"! That means that you can easily replace the switches without soldering.
Coloring
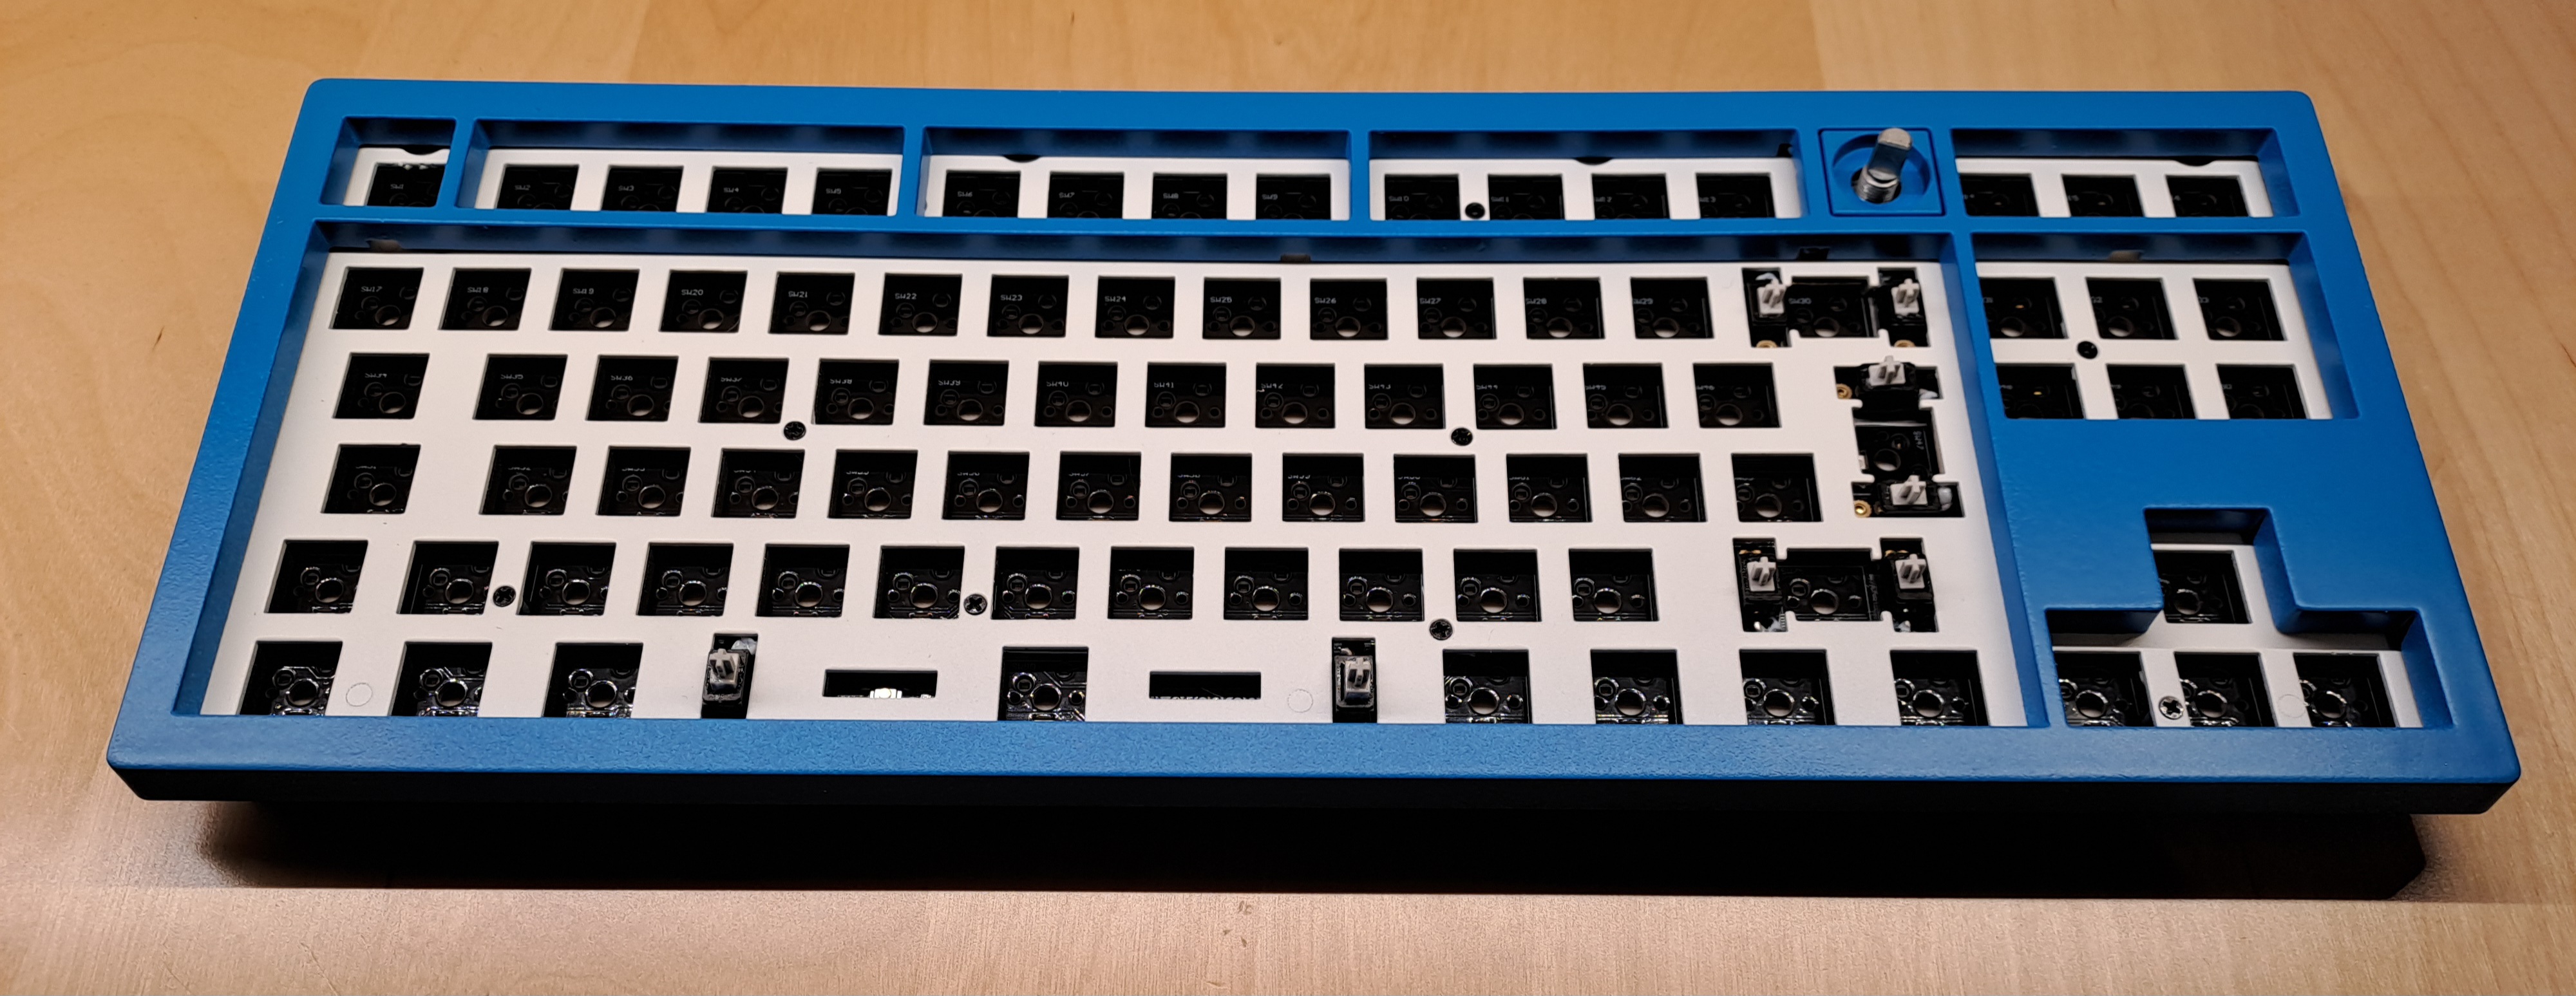
The case of the keyboard was made of slightly transparent, black plastic. But I wanted it to be a light blue just as the {CodeStore} main color. So I painted the keyboard case with acrylic spray paint.
In the first step, I disassembled the entire keyboard. As a preparation for painting, I roughened the surface with sandpaper to make the primer stick better. After two thin coats of white primer, I applied several coats of blue paint and finished with another coat of clear varnish to protect the paint from scratches. I have to admit, the finish is not 100% even, but for my first step into the world of custom keyboards, I'm very happy with the final result.
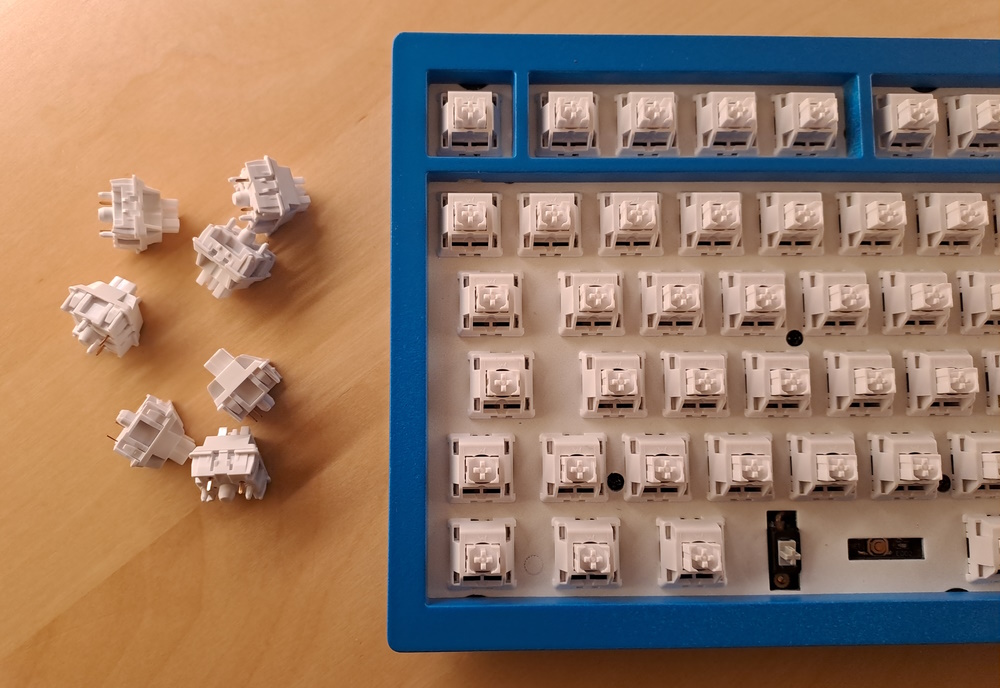
The Switches: WS Silent Linear
Mechanical keyboards are known to be quite noisy because of the direct plastic-to-plastic contact inside the switches. But since I planned to use the keyboard at work, I replaced the preinstalled Gateron red switches with WS silent linear switches. Silent switches differ from normal switches in that they have small dampers inside that reduce the noise when typing. You can still hear them, but they are way quieter compared to regular ones.
The Keycaps: Ducky PBT White
Keycaps usually come in one of two materials: ABS and PBT. ABS keycaps have a smooth surface that is nice to touch but attracts fingerprints easily. PBT keycaps, on the other hand, are more expensive and have a rougher surface which makes them more durable and less prone to greasy fingerprints.
In my case, I used white PBT keycaps from Ducky.
Sound
Last but not least, the sound test. The keyboard is so quiet, I had to increase the sound of the video. Only the space bar is clearly hearable.