
Convert Markdown to HTML - Or: How to Write Your Own Blog Engine
Aug 09, 2023
In today’s digital age, creating content for the web is easier than ever before. However, with so many tools and applications available, it can be overwhelming to choose the right one for your needs.
When I started creating this blog, it was clear that I wanted to integrate it into my own website instead of relying on an external platform. So I've been thinking about a way to add new content quickly and effortlessly. Writing plain HTML may seem simple, but it comes with plenty of markup overhead that makes maintaining lengthy articles difficult. Therefore, Markdown turned out to be the ideal solution for me. It is a lightweight markup language that allows me to write content in plain text and can be converted to HTML easily. This way, I not only retain full control over my content, but also have the freedom to customize the layout of the blog to my own preferences.
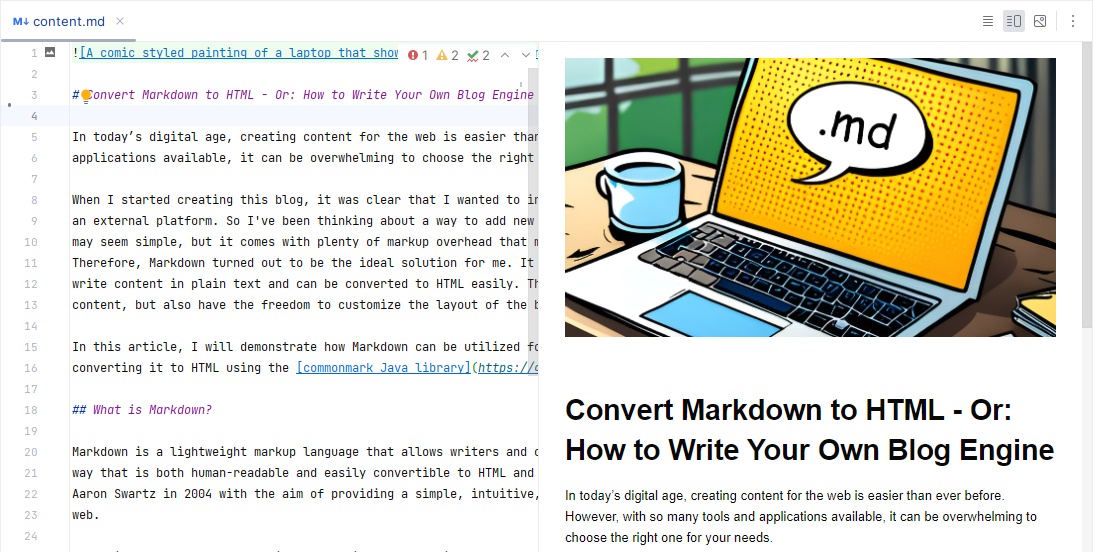
In this article, I will demonstrate how Markdown can be utilized for web content creation, along with the process of converting it to HTML using the commonmark Java library.
What is Markdown?
Markdown is a lightweight markup language that allows writers and content creators to format plain text documents in a way that is both human-readable and easily convertible to HTML and other formats. It was created by John Gruber and Aaron Swartz in 2004 with the aim of providing a simple, intuitive, and efficient syntax for writing content for the web.
The primary goal of Markdown is to make it easy to write and structure content without being slowed down by complex markup tags. It uses plain text characters and a few simple symbols to denote different elements of formatting, such as headings, lists, emphasis, links, images, and more. This simplicity makes it accessible to anyone, regardless of their technical background.
One of the major advantages of Markdown is its portability. Since it is just plain text, you can create and edit Markdown documents using a basic text editor, and they can be easily shared and viewed across different platforms and devices without any specialized software.
Markdown is used in various online platforms, including blogging, forums, documentation sites, and readme files in software projects, especially on GitHub. Because of its simplicity and versatility, it has become widely used for formatting content in these contexts.
Markdown supports a wide range of elements and alternative syntax. In the following sections, I'll introduce the most common markup elements that you'll certainly use when creating Markdown-based content. For a comprehensive reference to Markdown, visit www.markdownguide.org.
Headings
Headings are used to structure the content and make it easier to read. Markdown offers six levels of headings, each denoted by a different number of # signs. The top-level heading uses one #, second level two ##, third level three ### and so on.
For example, this blog article uses three levels of headings to nest topics:
# Convert Markdown to HTML - Or: How to Write Your Own Blog Engine
## What is Markdown?
### Headings
Paragraphs
Paragraphs are used to divide a large block of text into smaller sections. Unlike headings, which can only be expressed in a single line, paragraphs consist of a series of consecutive lines, with each paragraph separated by a blank line.
Paragraphs are the basic building blocks of Markdown that do not contain any prefixed markup. Basically, any text file that consists of only a handful of plain text lines is a valid Markdown file that contains a single paragraph.
Emphasis
Emphasis can be used to make certain words or phrases stand out from the rest of the content. It is usually accomplished through bold or italic text. In Markdown, this is done by surrounding the emphasised words using two asterisks (**) for bold text and one asterisk (*) for italic text.
Links
Just like in HTML, links play a crucial role in connecting documents and web pages, acting as the glue that holds everything together. Links allow for the ability to connect, refer to and share information from external sources. In Markdown, links are created by surrounding the link text in square brackets, followed by the link URL in parentheses.
For example:
[This is a link to the {CodeStore} home page.](https://codestore.cloud)
Images
Adding images to documents is a great way to provide visual information, which can be easier for some people to understand than text. The Markdown syntax for embedding images is similar to that of links, indicated by an exclamation mark. The alt text is enclosed within square brackets, while the URL of the image is specified within parentheses.
For example:

Code Blocks
When it comes to displaying code snippets in a Markdown document, code blocks prove to be an effective tool over screenshots of the corresponding lines of code.
Markdown supports two types of code blocks: inline and multiline, each serving a specific purpose. Single backticks are used to highlight a single line of code within the text. However, for more extensive pieces of code that deserve their dedicated space, triple backticks are used to create a multiline code block. Depending on the rendering engine, code blocks can even provide syntax highlighting, further enhancing their visual appeal and readability.
For example:
```java
public static void main(String[] args) {
    System.out.println("Hello, World!");
}
```
Despite the fact that code blocks are not very commonly used outside of software-related content, I didn't want to omit this kind of markup. After all, this blog is all about software development, and you are likely to write software-related content as well.
Convert Markdown to HTML
Now that you've learned how to write Markdown files, let's dive in and convert them to HTML using the commonmark Java library. This straightforward process only requires a few lines of code.
First, the content of a Markdown file is read and parsed. The result of the parsing process is a document object that encapsulates the entire document structure in a tree-like data structure. At this stage, we have the flexibility to modify both the document structure and its content - but more on that later. In the last step, we render the document to HTML.
As the rendered HTML only includes the elements from the original Markdown file, you need to embed it in a suitable HTML document. This includes the use of the necessary doctype and other tags to ensure correct display in a web browser.
public class MarkdownConverter {
    public String convertToHtml(Path markdownFile) throws IOException {
        String content = Files.readString(markdownFile);
        Parser parser = Parser.builder().build();
        Node document = parser.parse(content);
        HtmlRenderer renderer = HtmlRenderer.builder().build();
        return renderer.render(document);
    }
}
Modify the Document Structure
As stated earlier, we have the flexibility to customize the rendering of the Markdown document. After parsing, we can modify its structure to fit our needs. This is particularly beneficial when we want to include additional information like creation time, author details, or other metadata that are not directly present in the Markdown file itself, but stored in external sources such as databases or separate files. By doing so, we can enhance the overall quality and presentation of the document while preserving its original intent.
To simplify matters, let's consider a scenario where we read the creation time of a markdown file and display it below the main headline, as in this blog article. To accomplish this, we iterate through the document's nodes, searching for a node of type Heading with a level of 1. Remember, headings are assigned levels to indicate the hierarchical structure of a document. Therefore, the primary heading typically has a level of 1. Once we locate the corresponding node, we can simply append the creation time as a paragraph after it.
public class MarkdownConverter {
    public String convertToHtml(Path markdownFile) throws IOException {
        String content = Files.readString(markdownFile);
        Parser parser = Parser.builder().build();
        Node document = parser.parse(content);

        String creationDate = getCreationDate(markdownFile);
        insert(creationDate, document);

        HtmlRenderer renderer = HtmlRenderer.builder().build();
        return renderer.render(document);
    }

    private String getCreationDate(Path markdownFile) {
        String isoDateTime = Files.getAttribute(markdownFile, "creationTime").toString();
        OffsetDateTime creationDate = OffsetDateTime.parse(isoDateTime);
        DateTimeFormatter dateFormatter = DateTimeFormatter.ofLocalizedDate(FormatStyle.MEDIUM);
        return creationDate.format(dateFormatter);
    }

    private insert(String creationDate, Node document) {
        for(Node node = document.getFirstChild(); node != null; node = node.getNext()) {
            if(node instanceof Heading heading && heading.getLevel() == 1) {
                Paragraph paragraph = new Paragraph();
                paragraph.appendChild(new Text(creationDate));
                heading.insertAfter(paragraph);
                break;
            }
        }
    }
}
The text which contains the creation date is simply wrapped inside a paragraph. Thus, when rendered, it will appear as
<p>Aug 9, 2023</p>
Modifying the document structure at this point allows us to add a touch of dynamic into the typically static Markdown files.
Customize HTML Rendering
The commonmark Java library offers multiple options to customize the HTML output during the conversion process. In the upcoming sections, I will present two methods to achieve this customization.
Modify HTML Attributes
Modifying HTML attributes offers a straightforward approach to achieve a personalized output. For instance, we can assign custom CSS classes to specific element types. Furthermore, we can examine the content within those elements to specify even more fine-grained styles. This enables us to enhance the quality and finesse of our design.
In this section, I will show you how this approach helped me change the URLs of the embedded images on my blog, leading to a better maintainability of the content.
Markdown images can include any URL pointing to an existing web image. Although browsers can correctly resolve full URLs, it's simpler to just provide the image name in the Markdown file. This reduces markup overhead and enables Markdown editors to display images accurately.
As an illustration, the markup  is used to reference an image named "title.jpg" located next to the Markdown file. This way, the image can also be displayed correctly in the Markdown editor of IntelliJ IDEA.
To resolve the gap between Markdown and HTML content, we can dynamically modify the "src" attribute of images using an AttributeProvider. In the provided code snippet, the "src" attribute, which only contains the file name, is replaced with the full URL to the file. This approach ensures seamless integration and proper rendering of the images.
public class ImageAttributeProvider implements AttributeProvider {
    @Override
    public void setAttributes(Node node, String tagName, Map<String, String> attributes) {
        if(node instanceof Image) {
            attributes.computeIfPresent("src", (attributeName, imageName) ->
                    "https://codestore.cloud/blog/%s".formatted(imageName));
        }
    }
}
To make the AttributeProvider work, it needs to be added to the renderer.
HtmlRenderer.builder()
            .attributeProviderFactory(context -> new ImageAttributeProvider())
            .build();
Customize HTML Markup
For enhanced control over the generated HTML markup, we have the option to define custom nodes and their respective renderers. This allows us to personalize the presentation of these elements in HTML according to our preferences.
Let's revisit the previous example of adding the creation date to the article. In this example, we will make use of a custom node and a corresponding renderer. This allows us to personalize the resulting HTML markup, offering greater control and flexibility in our designs.
public class CreationDate extends CustomBlock {
    private final String creationDate;

    public CreationDate(String creationDate) {
        this.creationDate = creationDate;
    }

    public String getCreationDate() {
        return creationDate;
    }
}

public class CreationDateRenderer implements NodeRenderer {
    private final HtmlWriter writer;

    public CreationDateRenderer(HtmlNodeRendererContext context) {
        writer = context.getWriter();
    }

    @Override
    public Set<Class<? extends Node>> getNodeTypes() {
        return Set.of(CreationDate.class);
    }

    @Override
    public void render(Node node) {
        writer.line();
        writer.tag("div", Map.of("style", "color:gray;"));
        writer.text("This article was created on " + ((CreationDate) node).getCreationDate());
        writer.tag("/div");
        writer.line();
    }
}
Make sure to add the CreationDate node to the document, as we did it previously with the paragraph.
private insert(String creationDate, Node document) {
    for(Node node = document.getFirstChild(); node != null; node = node.getNext()) {
        if(node instanceof Heading heading && heading.getLevel() == 1) {
            CreationDate node = new CreationDate(creationDate);
            heading.insertAfter(node);
            break;
        }
    }
}
For the CreationDateRenderer to be called, it must be registered correctly in the HtmlRenderer.
HtmlRenderer.builder()
            .nodeRendererFactory(CreationDateRenderer::new)
            .build();
Based on the custom renderer, the HTML output is accurately written as
<div style="color:gray;">This article was created on Aug 9, 2023</div>
Syntax Highlighting
As previously mentioned, certain tools can enhance the appearance of code snippets within a Markdown document by providing syntax highlighting. However, since this is not directly supported by the commonmark library, it's necessary for us to manually integrate syntax highlighting.
Fortunately, there are plenty of JavaScript based syntax highlighters on the web, such as highlight.js, Prism and CodeMirror. I use CodeMirror in the {CodeStore} application because it provides a full-featured code editor and tons of extensions. But its setup process is quite complex. For this blog I don´t need the wide range of functions of an editor, but only simple syntax highlighting. So, I decided to use highlight.js because it´s lightweight, easy to set up, and it integrates seamlessly in the resulting HTML.
When called, highlight.js automatically highlights all code snippets in the form
<pre><code class="language-html">...</code></pre>
which matches exactly the markup produced by the commonmark library that we use to convert Markdown into HTML. This allows us to integrate syntax highlighting easily without having to customize the converted HTML in any way.
The only thing we have to do is to include the corresponding files provided by highlight.js. Besides the core library, we just need another JavaScript file which contains the syntax rules of the programming language we want to use syntax highlighting for, and a stylesheet for the desired theme.
<link rel="stylesheet" href="https://cdnjs.cloudflare.com/ajax/libs/highlight.js/11.8.0/styles/intellij-light.min.css">
<script src="https://cdnjs.cloudflare.com/ajax/libs/highlight.js/11.8.0/highlight.min.js"></script>
<script src="https://cdnjs.cloudflare.com/ajax/libs/highlight.js/11.8.0/languages/java.min.js"></script>
<script>hljs.highlightAll();</script>
The syntax highlighting can of course be further customized by using plugins and individual stylesheets.
Conclusion
Converting Markdown to HTML provides a huge amount of possibilities and flexibility for creating web content. With the straightforward syntax and easy-to-understand structure of Markdown, combined with the powerful customization and styling options of HTML, you have the tools to craft visually appealing and engaging web content.
In a world filled with powerful WYSIWYG editors, there's a certain charm in taking control of how your content fits into your website. It's not just about the final result, but the journey itself that has improved my skills and toolkit as a software developer along the way of creating this blog.